5 Keys to Home Comfort: How to Make a House More Comfortable
By Eric N. George
I get a lot of questions from homeowners that want to know why they’re so uncomfortable at home, and what they can do to be more cozy year-round. While every house is different, and every person feels comfortable at different indoor temperatures, there are five main things that will contribute to your home’s comfort level.
A comfortable home will:
1. Be well air-sealed (tighter is better)
2. Be properly insulated (slow heat-loss or gain)
3. Have a correctly-sized HVAC system (efficient equipment)
4. Have correctly-sized, sealed, and insulated ductwork (good, balanced airflow)
5. Use proper ventilation systems (control moisture/humidity)
Before you can get your home more snug and cozy, you need to understand these 5 Keys a little better. Here’s what you need to know.
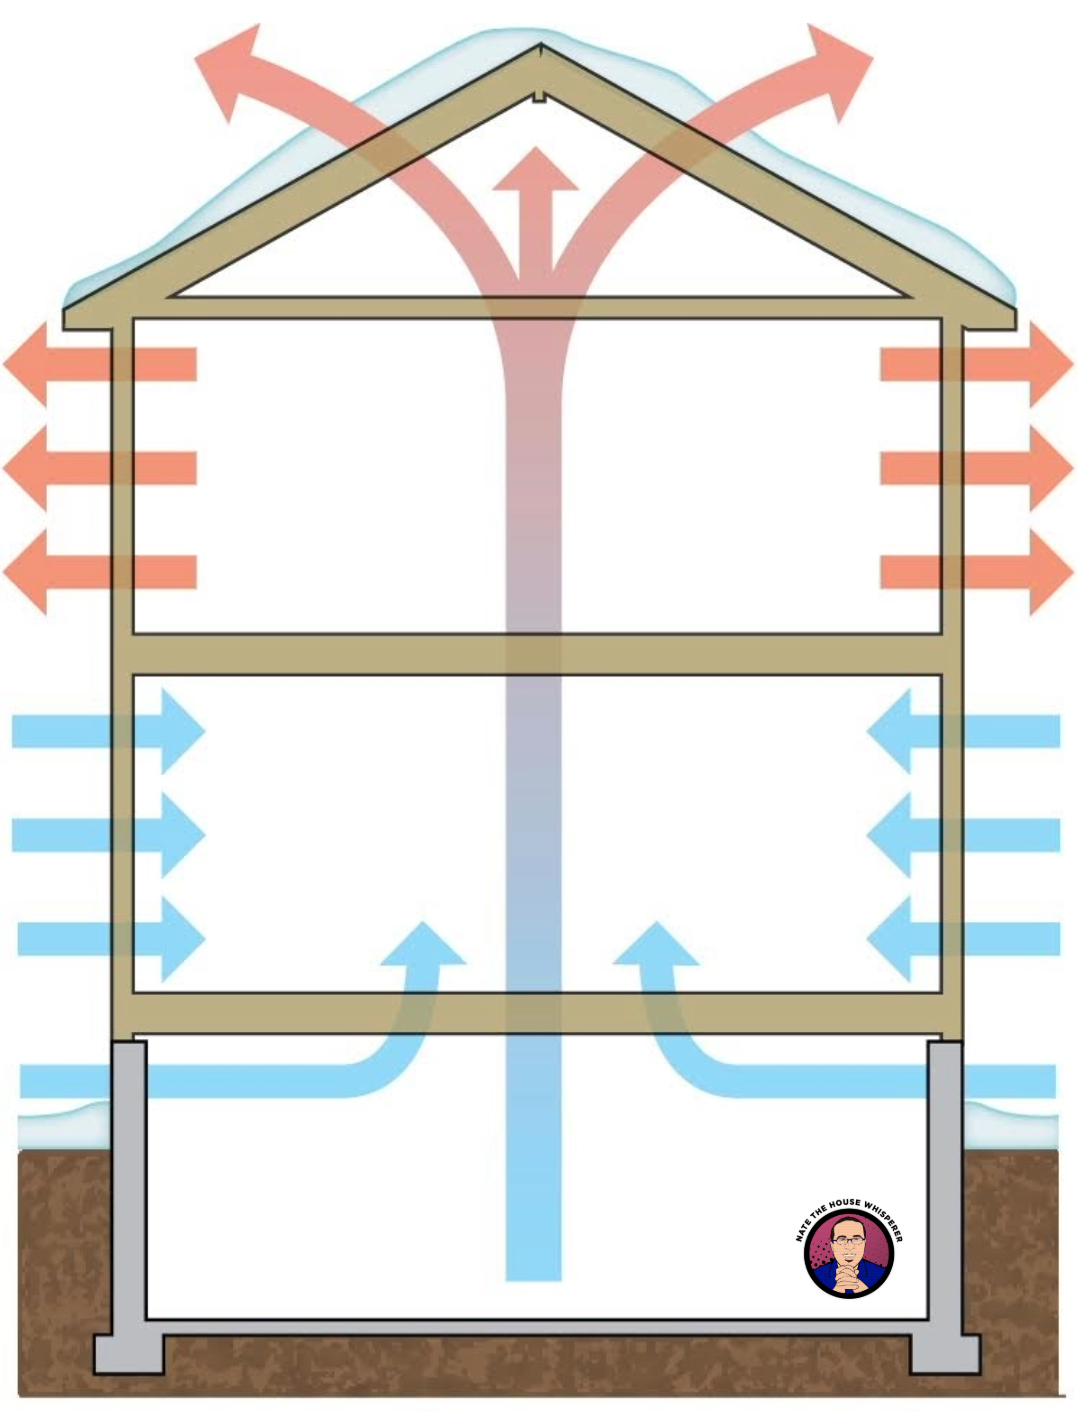
1. Air-Leakage - Older homes are typically very leaky, and the excessive air-leakage basically sucks all the warm, humid air right out of your house. If you can find the big areas where air-leakage is occurring and seal up those holes, then the rate of heat-loss will be reduced and you’ll keep more of that warm humid air inside, where it belongs (winter time). To find these leaks, we use a blower-door and an infrared camera to take thermal images of where these leaks are occurring.

Air-leakage is what really dries out houses, and dry air makes your skin feel colder, so the goal here is to keep the relative humidity indoors between 40-50% in the winter time. Lower humidity means you’ll need to crank up the heat to be more comfortable, and raising the temperature raises your bills too. Low humidity also can cause health issues from dry skin and sinuses. Conversely, anything higher than 60% relative humidity indoors and you could start growing mold, mildew, and fungi in places you don’t want!
Looks for places in your home where wires, pipes, gas lines, etc run from inside to outside and seal around those penetrations with silicone caulk or expandable foam. Best places to look are the attic floor, the rim/band joist between floors, and foundation walls. You’ll usually find dirty, darker-looking insulation wherever air leaks through, as well as spider webs nearby, so finding these things can help speed up the search.
Other places to seal up are the tops and bottoms of window trim. Typically, painters don’t caulk the trim to the wall at the top and bottom (because you don’t see these areas), so they are often an easy place to caulk and seal up quickly. Bottom line is if you can see daylight or feel air move through it, seal it up!
2. Insulation – The purpose of insulation is to slow down heat-transfer through the walls, ceilings, floors, and foundation walls, and this is measured by “R-value”. However, it’s important to note that not all insulation products are equally good at doing this. That’s because there are three modes of heat-transfer in buildings, and not all insulation is good at resisting all three modes. They are conduction (touch), convection (through air or water), and radiation (the sun).

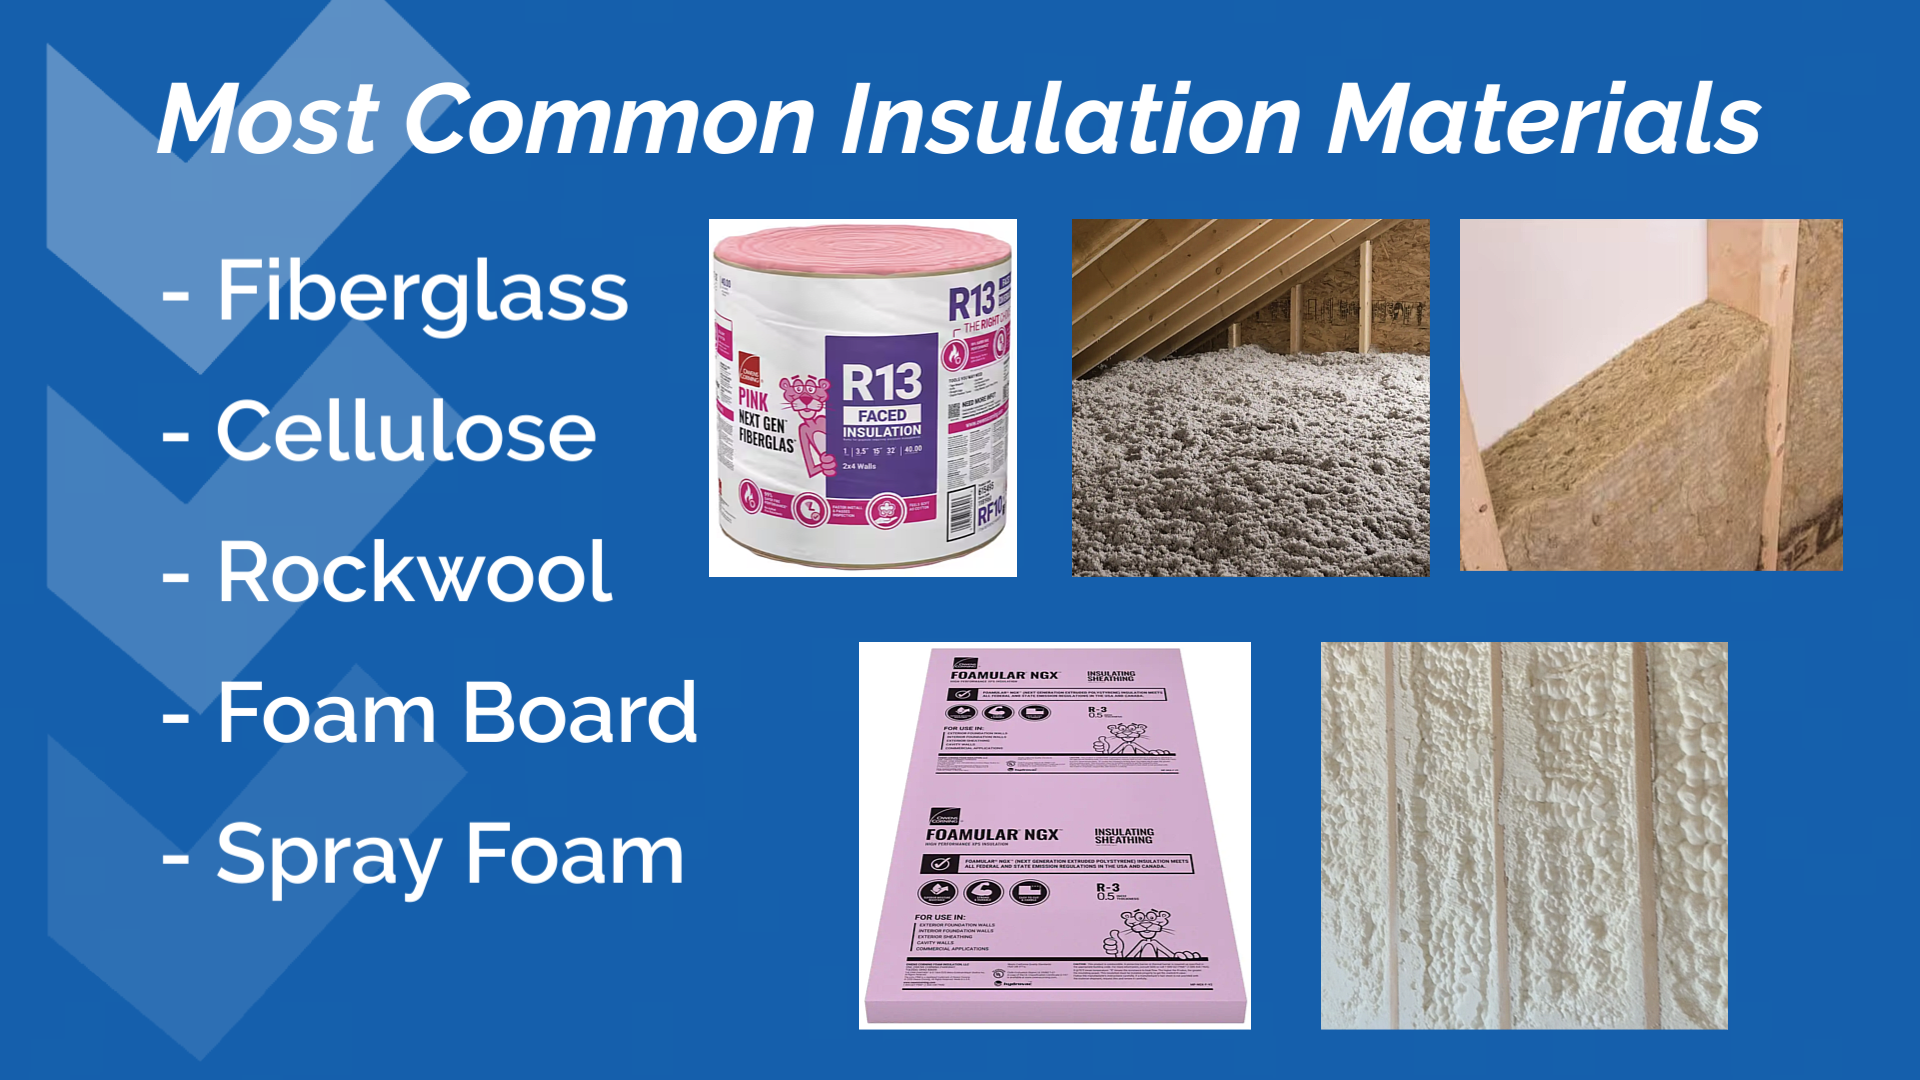
There are five main types of insulation used in homes today, and they are fiberglass, cellulose, rockwool, spray foam, and foam board. With fiberglass and cellulose, these products do NOT stop air-leakage by themselves and so an “air-barrier” is required to be installed for them to maintain their “effective R-value”. This is a good example of convective heat-loss that occurs through fibrous insulation materials. With foam, because of the higher density of these materials, you typically don’t need an air-barrier, so they’re more effective at reducing both conductive and convective heat-transfer.
What I recommend is to install the products that make the most sense, depending on where you need to insulate in your home. For example, spray-foam is the most expensive kind of insulation, so you want to use it where it’s the most difficult to insulate and air-seal the house. These places include: rim/band joists, foundation walls, vaulted/cathedral ceilings, and under roof decking.
For insulating walls and ceilings I generally recommend blown-in insulation like cellulose or loose-fill fiberglass. I absolutely prefer cellulose insulation in attics, as it is a denser product than fiberglass, fills small cracks and voids better, and will maintain its effective R-value better than fiberglass when it gets very hot or cold outside. Plus, it has great fire-retardant and insect/rodent-retardant properties as well, and it’s a 100% recycled product too.
When adding insulation to exterior walls, “dense-packed” cellulose or fiberglass works well. There are also injectable liquid foam insulation products that can be installed into exterior walls, but there have been many times we’ve seen this product leak out into basements and crawlspaces unexpectedly and even deteriorate to nothing inside walls (or simply not fill the walls completely), so I don’t recommend using them.
3. Heating & Cooling Systems (HVAC) - Many older homes have heating & cooling systems that are way bigger than they need to be, and this is to make up for all that air-leakage and lack of insulation. Problem is, once you start air-sealing and insulating your older home, you’ll actually make the HVAC system even more over-sized! Wait, what?!
Yes, it’s true. Air-sealing and insulating your home REDUCES the “heating & cooling loads” on your house, which means when it is time to replace your existing system you can install a smaller one that will work more efficiently.
So why are over-sized systems a bad thing? Because HVAC systems typically need to run for 10-20 minutes before they reach their “peak efficiency”, and if the system is over-sized it will only run for a few minutes at a time before turning back off. This is referred to as “short-cycling”, and it greatly reduces the overall efficiency and life expectancy of the system.
4. Ductwork - Those over-sized heating & cooling systems are also typically connected to ductwork that isn’t big enough to move the volume of air needed, and usually isn't air-sealed properly either. Especially in homes built before 1950, the ductwork was typically sized only for heating requirements, not cooling, and air-conditioners actually need more airflow than furnaces do to work properly.

Often you’ll see central A/C added to an older furnace and duct system, but the ductwork isn’t modified to support the extra airflow needed. This creates high “static pressure” in the HVAC system, which reduces airflow, efficiency, and output capacity, and can cause the “A-coil” inside to freeze up and break.
By testing the performance of the HVAC system and ductwork we can determine if it’s properly-sized or not, and if not, we can quickly determine where the issues are and plan a course for improvement.
Believe it or not, the National Comfort Institute (NCI) has found that the majority of existing HVAC systems can have their efficiency improved by 20-30%, simply by improving the air-flow through the ductwork!
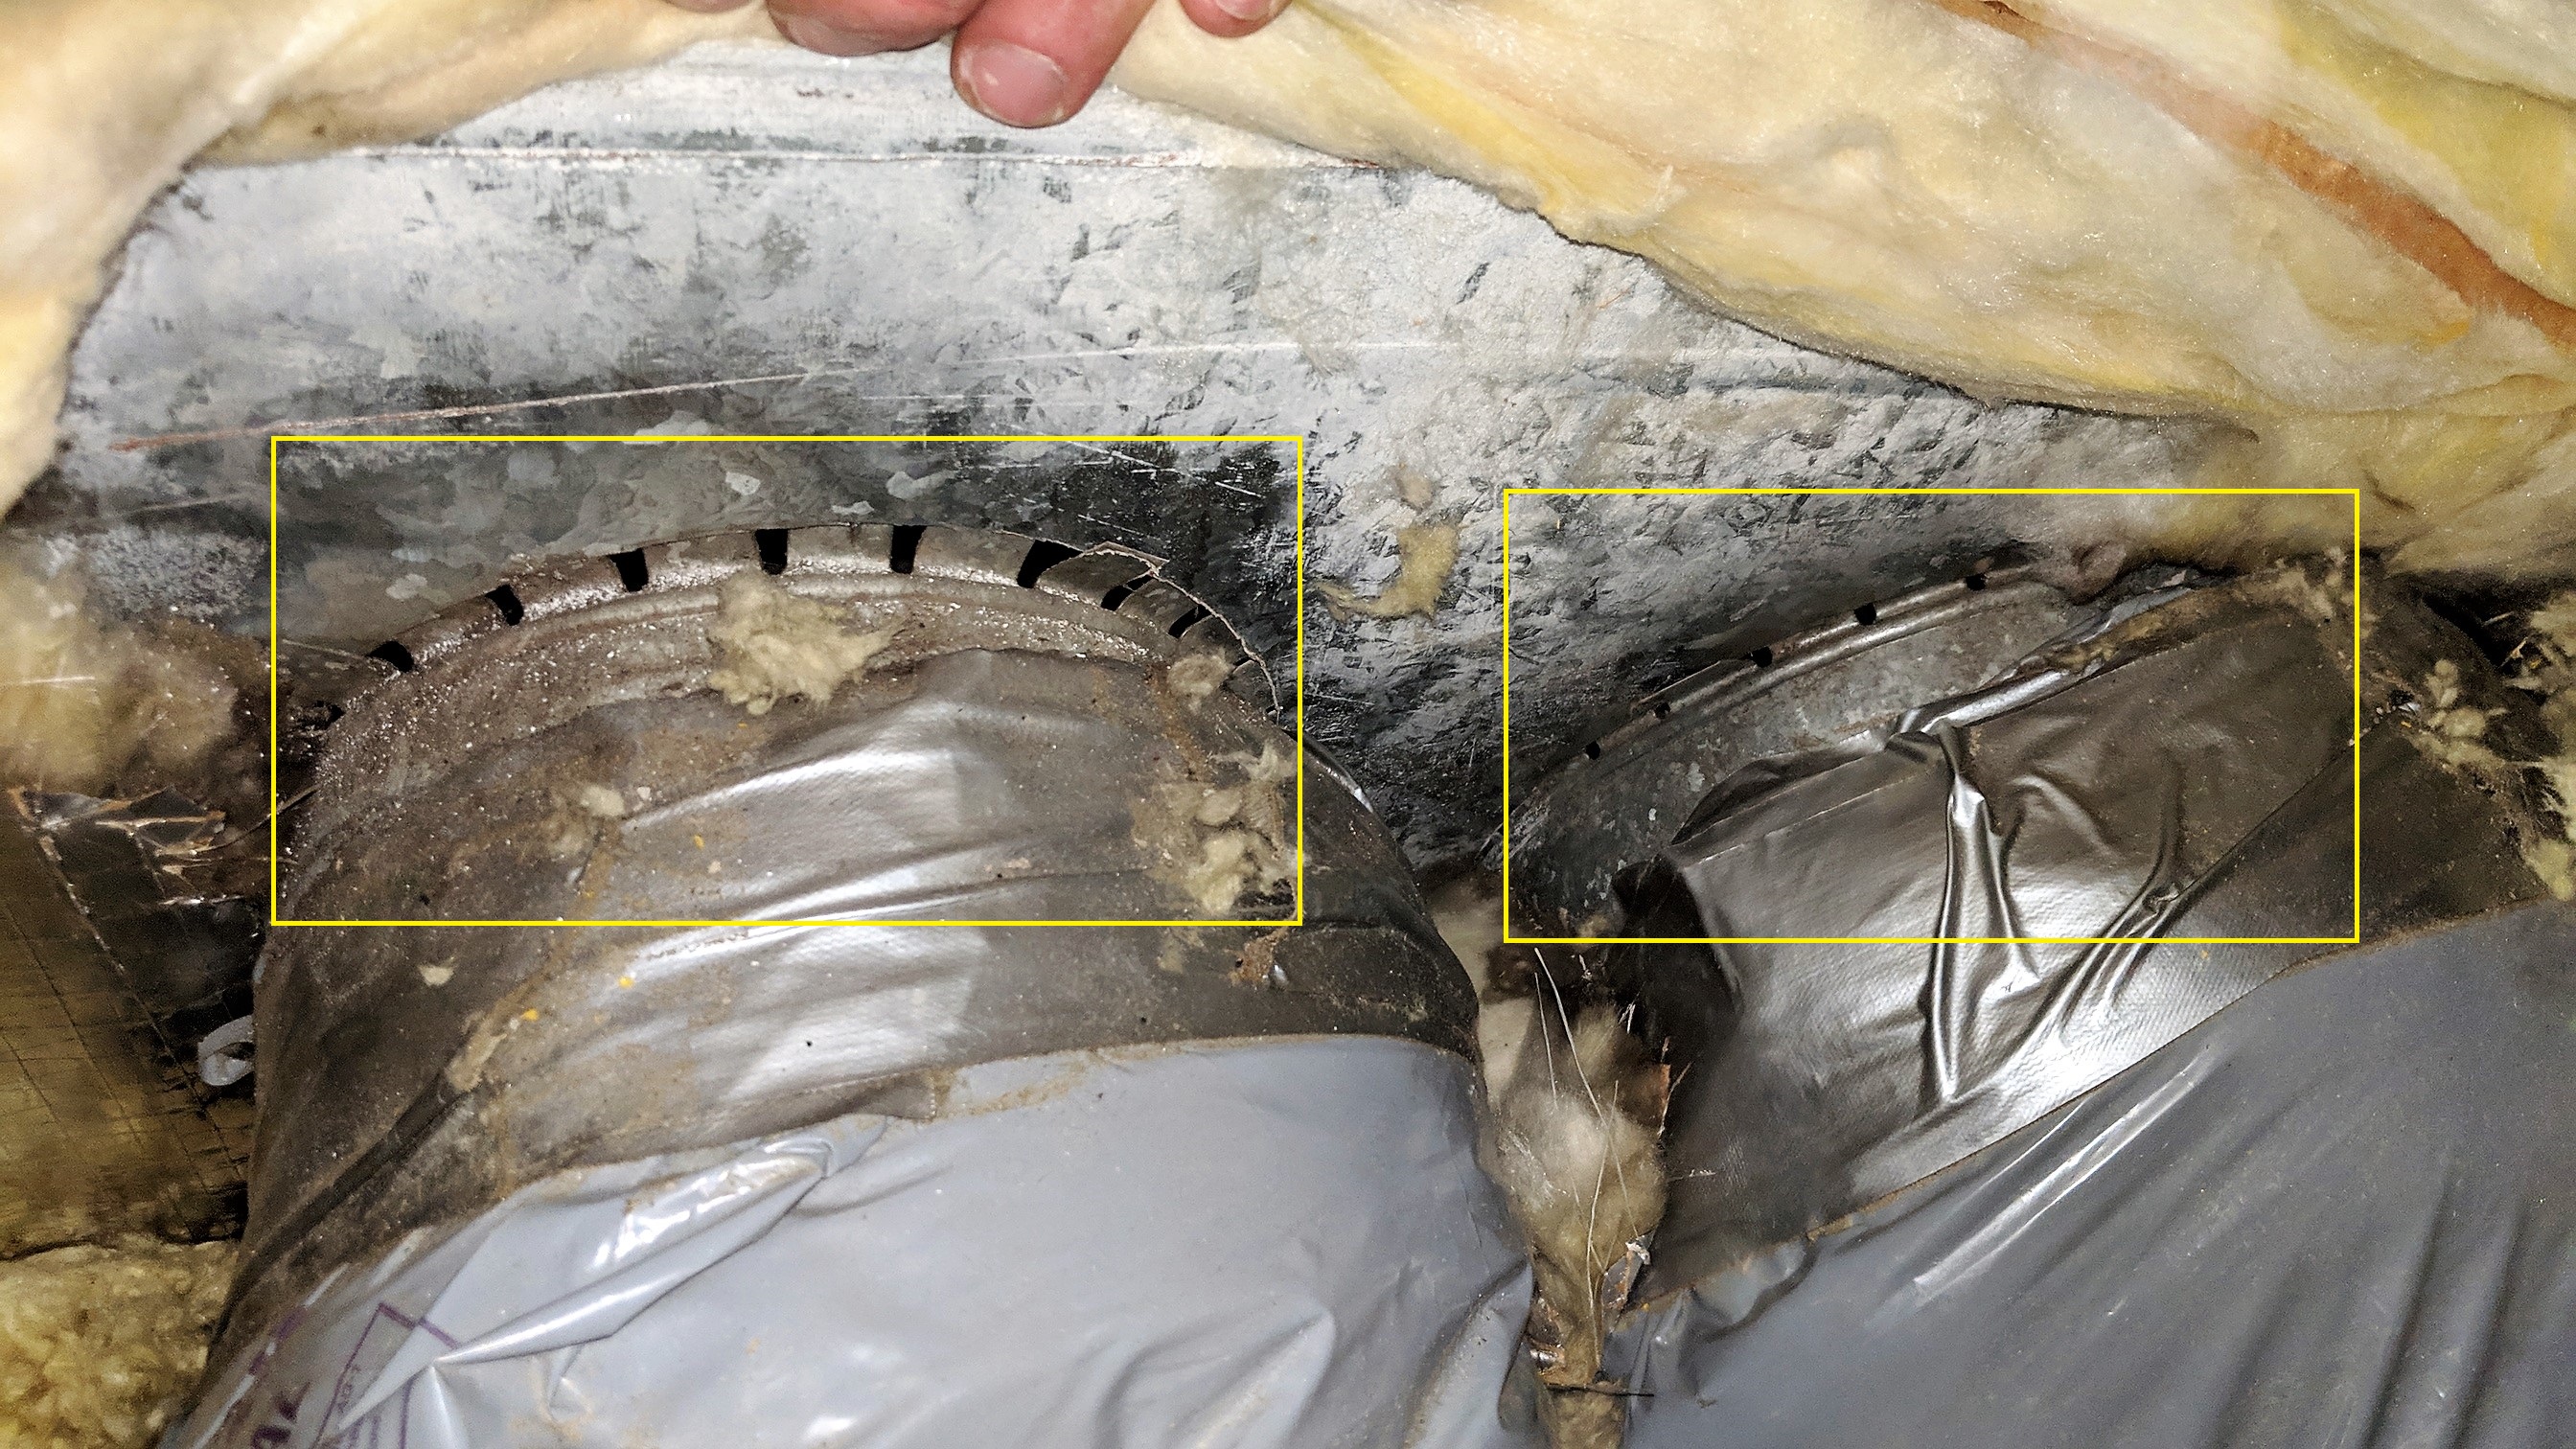
Making sure your ductwork is air sealed properly is another key to comfort! Any place where two pieces of ducting meet needs to be sealed.
5. Proper Ventilation – This is a big one that often gets overlooked and is crucial to the indoor comfort of your home, so let’s talk about humidity. Relative humidity is a funny thing, often misunderstood. It’s called relative humidity because the amount of moisture in the air is relative to the actual temperature. The key thing you need to know is that the warmer the air is, the more moisture it can hold.
There are two basic types of ventilation needed for homes –
1) Exhaust ventilation for moisture created inside the home, and
2) Natural ventilation for any moisture in the attic space to move outdoors via air-movement (wind).
Now, let’s think of where the moisture comes from inside homes. Kitchens, bathrooms, and laundry rooms are the main places where heat and water can add moisture to the air in your home, thereby raising the relative humidity indoors.
The important thing here is to make sure you have good exhaust fans that are properly ventilated straight to outdoors, so that any moisture you add to the air can be quickly removed, and not into the attic either! Exhaust vents in attics must exit through a gable end-wall (preferably), the roof, or a soffit overhang, and ideally have a backdraft damper built-in.
Some of the nicer exhaust fans today come with humidity sensors that automatically turn the fan on at certain set points, and others have timers that will shut the fan off after certain time limits. Either way, buy a good quality “Energy Star-rated” exhaust fan with a DC motor that is meant to run continuously, with very little noise. The “loudness” of exhaust fans is rated by “sones” and you want a sone rating of 1.5 or lower to be considered high-quality.
So, we’ve got indoor ventilation taken care of, now let’s turn to natural ventilation for attics. There is so much misinformation and misunderstanding of what the real purpose of attic ventilation is for, so let’s clear it up now. It is to remove any moisture that may build-up in the attic space, which can come from either the humid air outdoors, or by indoor air leaking up into the attic space.
In reality, the majority of moisture issues that occur in attics is due to warm indoor air leaking into the attic space, so by air-sealing and insulating the attic floor really well, you’ll significantly reduce any chance for indoor air to make its way into the attic above. No powered attic fans needed either, and by the way – these powered fans can actually suck more of your indoor air into your attic via these air-leaks, so don’t use them!
"So now that I know the 5 Keys to Comfort, how do I make my home more comfortable?"
A great way to learn more on home comfort and building science basics is by signing up for the Home Comfort Advisor online course! In just a few hours time, you'll gain a wealth of knowledge that will save you tons of time, money, and avoid headaches dealing with contractors trying to sway you to do things that may not help at all!
Another good resource to learn is through our YouTube channel. Make sure you subscribe to get updates on the videos posted every week!
Lastly, I offer online consultations to help you figure out your home's comfort issues and create a plan and scope of work to get started. If you live within an hour of Louisville, KY I can also inspect and test your home in person. To schedule an online consultation or an in person inspection, email me to get more details!

